Computer Rebuild
Recently, I rebooted my computer and got a warning message that said that my CPU was over-temp’ing. Being that I had it water cooled and overclocked, this was not a good message… so I did some upgrading, and man am I happy with it!
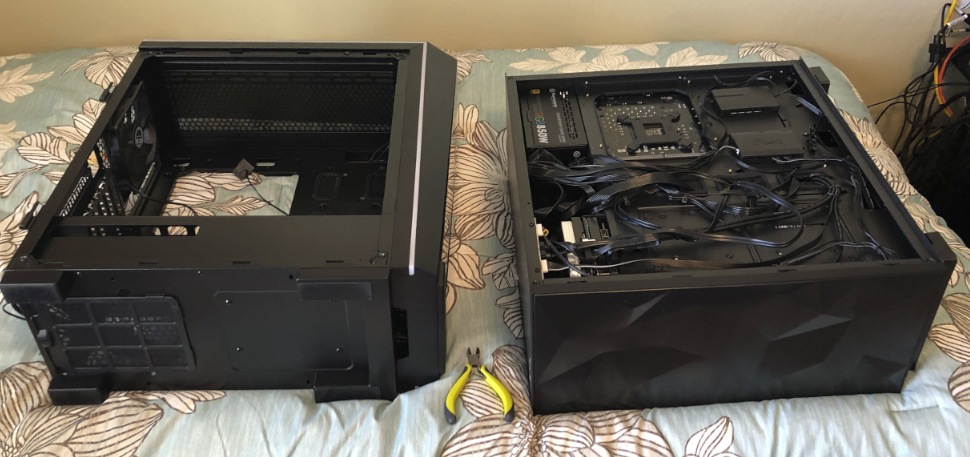
My old rig was made up of Rosewill components and I was pretty happy with the way it came together, but it was definitely cramped. I liked how it looked, but there was no intake on the front of the case, and the bottom was not big enough for the new 3-fan radiator that I bought to replace my old 1-fan rad.
The picture above shows the new radiator which does not allow three fans to fit within the confines of the case. The motherboard basically touches the radiator, which will not work for me trusting the rig; therefore, I replaced it. I’m sure I’ll find a home for this old case, no doubt about it.
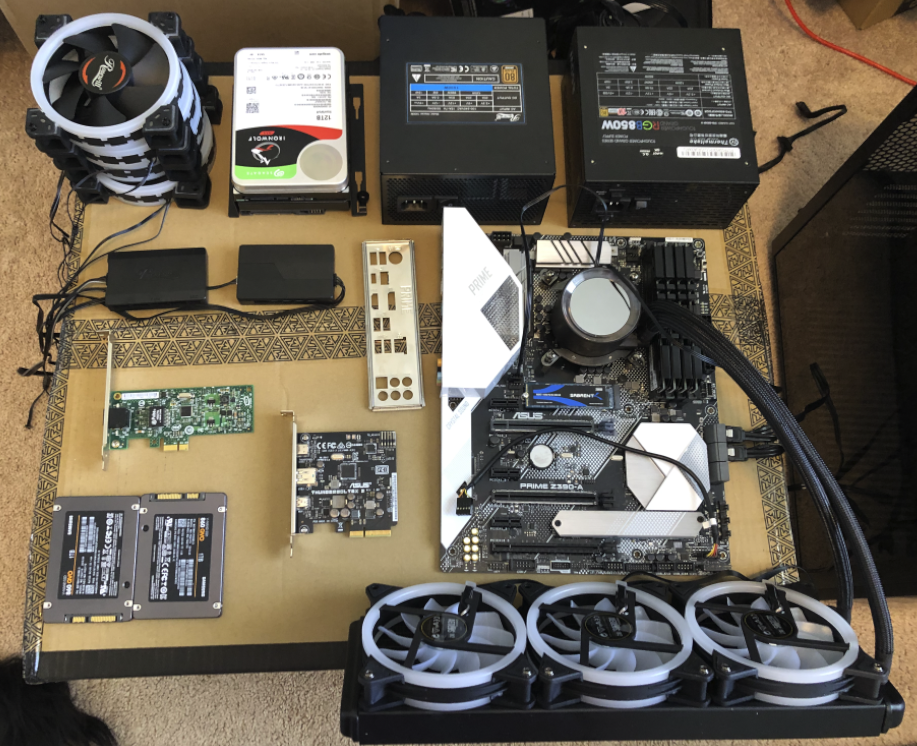
After removing everything from the old case, I decided to go ahead and upgrade the power unit to a 1K watt, instead of the 850 that I had in the old case. The rating on the new one is “Bronze” and the old one was “Gold” but I think that the little extra bit of power will help. I’d like to beef it up with a 1600 watt, but that will be a future project.
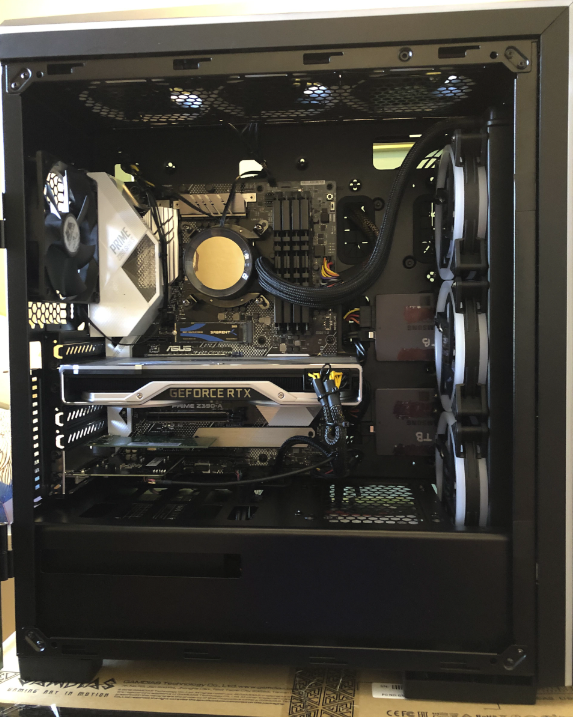
The PCI cards are to segment my network, and give me Thunderbolt 3. The extra network card is really important to me because I can confine all of my virtual machines to that card. In addition, it’s an intel card which I really trust. This segmentation of my network is for the hacking that I do on the sites where I VPN into the system. Theoretically, anyone else on the same subnet would be able to see me and my computer. This segmentation will allow a situation where someone completely pwns my kali virtual box, but has no access to anything else on my network.
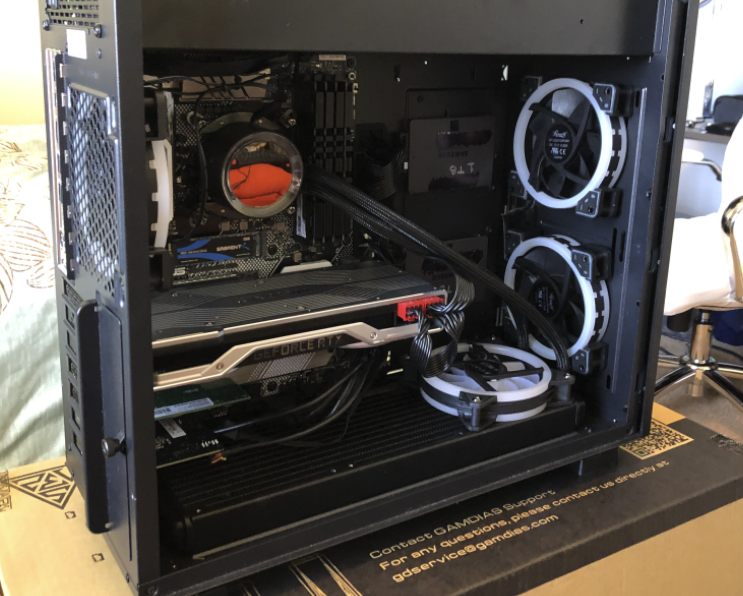
The two small black boxes are simply LED and fan controllers for Rosewill and Gamdiaz respectively. I went to the Gamdiaz products simply because it’s what was on the shelf at Fry’s Electronics. The reviews weren’t bad, and it was instant gratification. I did the same with the case, which is also a Gamdiaz. I’m extremely happy with the performance!
The build was relatively easy. I think that Gamdiaz did an amazing job on the engineering of their case. The only thing that was strange was on the expansion slot area where there’s a metal overhang over the screws that hold the expansion cards in. I have a 90-degrees philips head, so it was no big deal. The only other problem I have is with the exhaust fan. I don’t think it’s working, but I haven’t tested it on a different rig… but it’s not spinning while I’m writing this. I plan to replace it with one of the Rosewill fans.
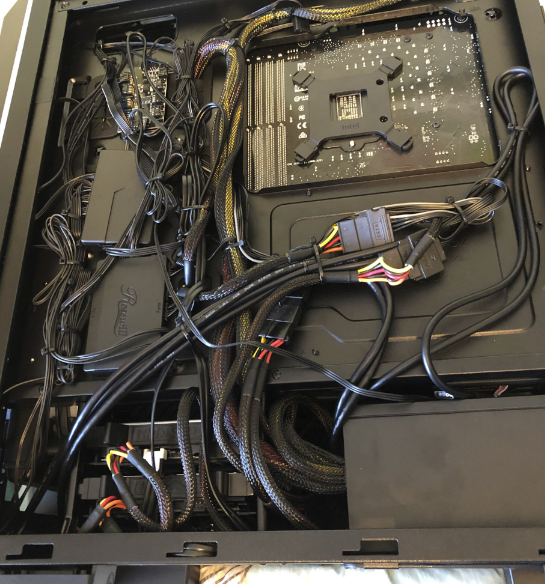
The craziest part of the build was by far the cable management on the back. The interesting thing is that only three of the cables that you see in this diagram are for the motherboard (SATA, Power, and Front-case Inputs). At this point in my life when I have built hundreds of computers, I feel as though the LED portion of the gaming cases is getting out of control! That said, it’s pretty cool, and worth the effort of using a hundred zip ties to get the cables organized.
Even with the crazy birds-nest of cables in the back, it really adds to the looks of the front. There are only a few exposed cables near the motherboard, and those were not avoidable. On the right of the case, you’ll see the 3-fan radiator. What you can’t see on this is the three other fans I have pulling air through on the front of the case. So in all, I have six fans pushing and pulling air through the radiator… pretty awesome. In addition, I have three more of my Rosewell LED fans on the top of the case that blow air onto the component. I like to have a ‘positive’ pressure scenario inside of my case where there’s more air being blown in than being exhausted. With my stress tests after the builds, it’s working quite well. It’s 10 fans in all.
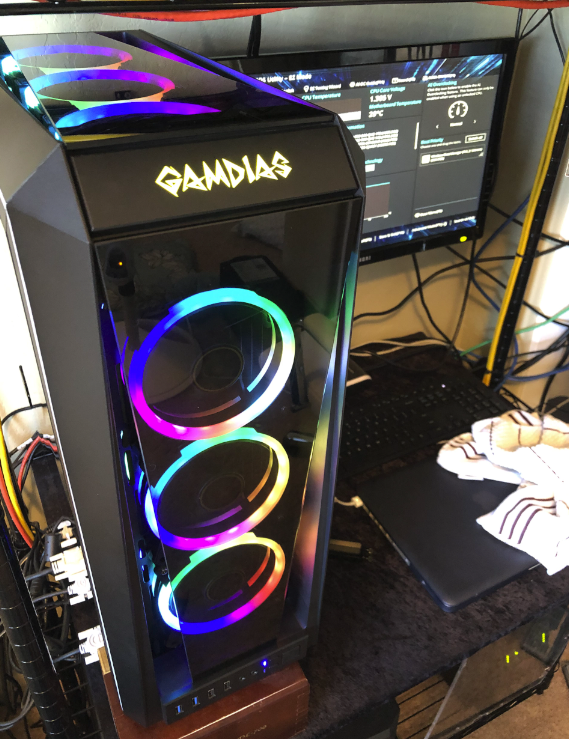
The finished product came out pretty well. One thing that I did was disconnect the LED leads from the motherboard so that I could control them through the remote control that came with the water-cooled system.
Once I got Windows up and running, I was able to do some stability testing using the Intel Stresstest Utility. My first attempt at overclocking was a bust. I got the blue screen of death when I tried to get the CPU to boost to 5.0GhZ non-stop. I also boosted the RAM to 3600 Mhz, which is what it is rated for. But it was definitely not stable!
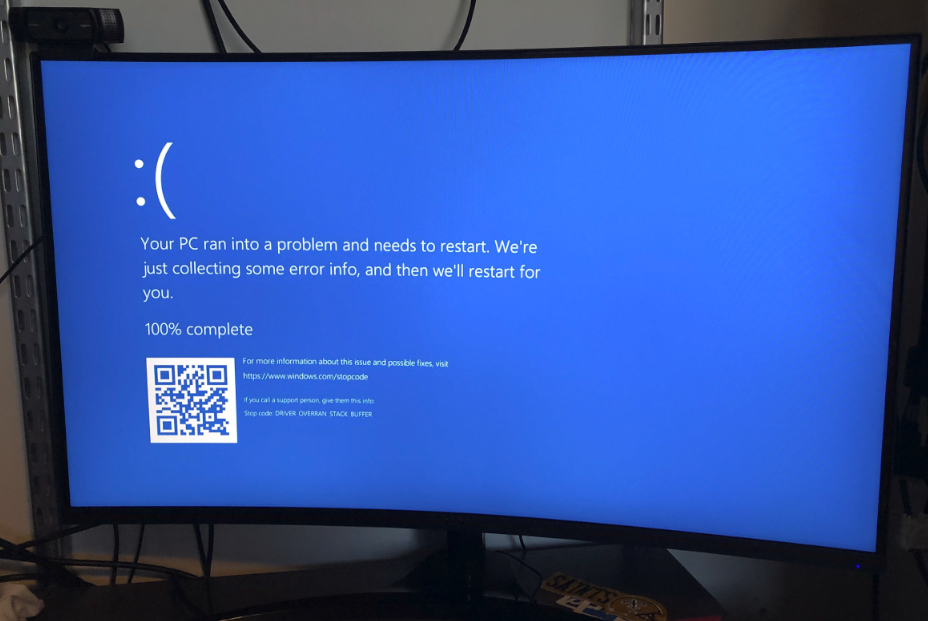
I actually got this Blue Screen Of Death (BSOD) several times during the overclocking. As I tweaked the BIOS to get things to run properly, I think that my numbers on my RAM were the problem. I ended up letting the ASUS motherbaord’s pre-computed overclock settings due the work, and considered this a done project for now. I can certainly go back and tweak it even more later, but for now, I’m getting about 4.7GhZ and the 3600 on the RAM that I wanted… so the rest of the night will be practicing hacking with a stable setup. I’m very happy with it, though!
So after this build, here’s my new specs:
CASE: Gamdias Tolos P1A
MOTHERBOARD: Asus PRIME Z370-A
CPU: Intel i9 9900K
RAM: OLOy 64GB DDR4 3600
GRAPHICS: Nvidia GeForce RTX 2080 TI FE
WATER COOLER: Gamdsias Chione P2 360R